GURPREET KHALSA
Unit 1
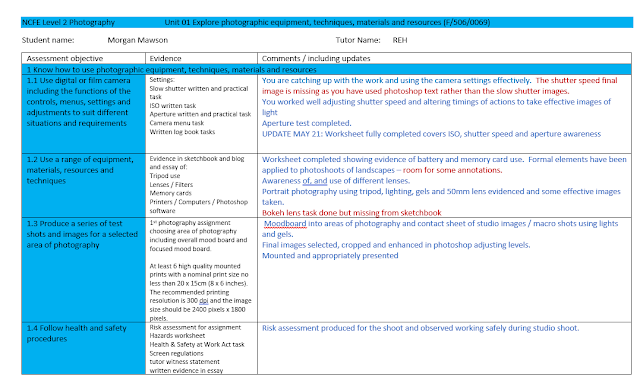
Coversheet with feedback, final grade and tutor comments:
PASS
1.1
Use digital or film camera including the functions of the controls, menus,
settings and adjustments to suit different situations and requirements
1.2
Use a range of equipment, materials, resources and techniques
introduction to photoshop tools for photo manipulation / editing
1.1
Use digital or film camera including the functions of the controls, menus,
settings and adjustments to suit different situations and requirementsAperture test - some confusion in write up discussed after feedback given and Gurpreet recognises the settings and effects.
1.1
Use digital or film camera including the functions of the controls, menus,
settings and adjustments to suit different situations and requirements
1.1 / 1.2
1.2
Use a range of equipment, materials, resources and techniques
Applying formal elements, framing and composition choices and using camera settings
1.1 understanding settings and results achieved
1.2 Techniques: Applying formal elements to photography
1.2 1.2
Use a range of equipment, materials, resources and techniques
Understanding lenses
1.1 / 1.2 Making a bokeh lens and setting camera to take effective images.
1.2 Experimenting with lenses
1.3
Produce a series of test shots and images for a selected area of photography
Types / areas of photography research to help select own area
1.3 researching areas of photography to aid own photoshoot
1.3 researching areas of photography to aid own photoshoot1.3 researching areas of photography to aid own photoshoot
1.3 researching areas of photography to aid own photoshoot
1.3 plan for fashion photography photoshoot
1.3 contact sheet evidence of all 8 model fashion shoots showing vast evidence of 1.1 and 1.2 also.
1.3 Final photoshoot presentation
Evaluation covering 1.1, 1.2, 1.3 and 1.4 evidence
See tutor comments on coversheet
|
1.1 Use
digital or film camera including the functions of the controls, menus,
settings and adjustments to suit different situations and requirements
|
|
1.2 Use a range of equipment,
materials, resources and techniques
|
|
1.3 Produce a series of test
shots and images for a selected area of photography
|
|
1.4 Follow health and safety
procedures
|
1.1, 1.2, 1.3, 1.4. All areas addressed in evaluation of unit 1 work including health and safety and how there was an incident and the reason why making him more mindful of the need to assess risks and stay safe.
Summary: Comments by tutor
PASS awarded for this unit
Overall, Gurpreet has shown clear evidence of being able to explore photographic equipment, techniques,
materials and resources.
Tasks and research into camera settings, use of lenses, tripods, memory cards, filters, lighting have all been demonstrated.
Photoshop skills have been developed to edit images subtly and more extensively.
He has worked safely and identified when incidents occurred and reasons why and appreciation of why risk assessments are so important.
UNIT 2 Develop and Adapt Photographic ideas
Tutor feedback / coversheet - Result PASS
1.1
Research Photographers’ images.
1.2
Describe photographers’ methods and use of visual language.
Below is evidence of analysis of a range of sequential / narrative photography showing research skills and clear ability to describe methods and use visual language. (R Horner)
Analysis sent via Teams (copy and pasted) - photo not showing up on blog. (Tutor R Horner)
The reason I love this image because it shows what sequential photography is about without any confusion. You can easily understand what the photo is showing us. It’s so easy that anybody can do it. To be honest, I don’t have a clue how the photographer created that image and made it look amazing. But it has inspired me to do something like that and I will try my best to create it.
2.1
Develop ideas using a range of sources
2.2
Produce exploratory images
All completed in lockdown - Gurpreet has successfully developed ideas with plans and moodboards in his sketchbook and practice shoots.
I copied the emotions photography using my mobile phone camera to capture my own emotions as a test piece.

emotions
Second arrangement following feedback
shoe lace
Vanishing man - self portrait inspired by my research
2.3
Adapt ideas in response to feedback
Presented work to class via Teams meeting and gained research (images fromTeams won't show on blog but Gurpreet has commented on his feedback and development plan (copied and pasted below) (Tutor R Horner)
Feedback from presentation
I have showed my images to students and teachers that are in my class through Teams and they gave me feedback about my sequential photography ideas. The first photo I showed was an image of my shoe image in black and white. In my second idea, I was showing my different type of personality by cloning my myself and putting it in one picture. My last one was about hiding parts of me. The clear ones are what I want people to see and the blurred ones are about what I’m really like and I don’t want people to see it.
The feedback was brilliant from my class. For the first one, Rachel talks about black and white works really well and there are different shapes in the image to attract the eye. She also talked about how such a simple story makes sense and looks interesting. Adele also mentioned the same thing that “it's something so simple made interesting.” For the second photo, everyone really liked it and it was really cool. Harry said that he really liked the use of colours and for the last one, everyone also loved this one especially the last image because it looks very mysterious and secretive and the reason is that you couldn’t see my face at all in it. Sophie mentioned that the images show a range of different stories and the framing used draws the eyes in search for meaning. I don’t know which one the class liked the most but, in my opinion, I think they liked the last one because it tells more than one story when you look at it. They didn’t give me any suggestions on how to develop my ideas and I don’t think they need to because in my opinion, my pictures look fantastic as the way that they are. I am not going to use any of pictures from task 4 for my final photoshoot. I’m doing a completely new sequential idea for my final photoshoot.
Idea 1
Original photos for shoot 3
2.3 Adapt ideas in response to feedback
My final shoot
Final version edited in photoshop using masking layers to add me to the first layer.
Final sequential image inspired by my research
2.3 Adapt ideas in response to feedback
All sequential pieces are well produced and effective in visual language use. Gurpreet used feedback to set himself a final idea of the beach jump

2.4 Assess own work and reflect on the use of visual images.
Evaluation includes some appreciation of strengths and techniques employed to create final images. (Tutor: R Horner)
Evaluation of my work
I was exploring sequential photography and I have done research into different photographers such as: Kim Taylor, Dan Carr, Andrew Gilmore and many more. I also looked at their images to explore my ideas. I created 10 different sequential photography ideas and chose 3 of them for my shoot. For my first idea, I made a story of: wearing my socks, putting my shoes on, tying the laces and walking away. After I took the images, I went to photoshop to put them in a portrait frame in order so it would make sense. I didn’t edit them at all because I want my work to look as natural as possible. My second idea was, I took three pictures together and in the first one, it was just me looking in the camera. For the second photo, the cameras on 10” shutter speed and I just kept shaking my head. For the last image, it was on 30” shutter speed and it almost looked like I disappeared, but you could see my necklace and jumper. For the last and my favourite shoot, I wanted to do something better than my last two ideas, so I decided that I was going to show different sides of me in the same photo. I did that by putting the camera on the tripod and it was landscape. The camera was on 10 sec timers, so I would put the camera on a timer and stand in front of it and make an expression. I changed into another outfit and did the same thing for about 5 times. Then I went to photoshop and it took me a long time to put them together using masking layers.
I received feedback about my images from everyone that was doing the project and their opinions helped me to decide my final photoshoot. My final shoot was the hardest one out of all the shoots I have done so far. I went to Redcar and stood on the top of the highest sand dune and told my friend to take my continuous photos as I jump from the top.
I did assess the risks as much as I could but I wanted to do a spectacular jump so my image looked good. I made sure there was no rocks or glass or anything hard that I could land on and I set my tripod and camera up as securely as I could in the sand. I thought to myself that it would be easy and there is nothing to worry about as I did it before. So, I jumped, and I should have landed on my feet, but I fell on my hip and got covered in sand. It was disgusting, but It was worth.
I did the same thing with these images as I did with my 3rd sequential photography idea when I went to Photoshop. When I finished editing it, it looked amazing! That was my best work so far and I don’t think I could do any better. If I could do the photoshoot again, I would probably pick a lower sand dune and add another sequence of me in the image. I have enjoyed this project so much that I can’t describe in words because it pushed me out of my boundaries and did a lot of hard work to make the images look fabulous.
Tutor Overall comments:
PASS awarded
- Produced during lockdown I am so impressed by Gurpreet's ability to take some superb photos for sequential photography and to be able to use photoshop to edit them (self learning using online guides.)
- He has completed work that clearly addresses all assessment objectives and it is clearly evident how he has researched the work of others to inform his own ideas and develop techniques to create his own sequential images that are creative and ambitious
Unit 9
|
2.1 Outline the main health and safety, legal and
ethical issues when preparing for and managing an experimental photographic
shoot
|
|
2.2 Outline the
steps in the preparation and management of an experimental photographic shoot
|
|
2.3 Describe how
the working environment should be maintained
|
1.1 Describe examples of historical and contemporary experimental and alternative process photographs |
1.2 Outline photographic intentions, themes and influences that could be applied to own work |
2.3 Describe how the working environment should be maintained
2.1 Outline the main health and safety, legal and ethical issues when preparing for and managing an experimental photographic shoot
H&S
Legal and Ethical
2.2 Outline the steps in the preparation and management of an experimental photographic shoot
PLAN

|
1.1 Describe examples of historical and contemporary
experimental and alternative process photographs
|
|
1.2 Outline
photographic intentions, themes and influences that could be applied to own
work
|
Essay exploring experimental photography and alternative processes.
1.2 Outline photographic intentions, themes and influences that could be applied to own work
3.1
Select, set up, prepare, handle and dismantle equipment safely
|
3.2 Produce experimental photographic outcomes
|
|
3.3 Experiment
with different techniques for post-camera image manipulation
|
3.1 handmade negative and photograms experiments in the darkroom - some used for final work
3.4 Review image quality in own experimental photographic outcomes
Annotations show review of outcomes
Clear evidenc eof 3.1 and 3.2 with a range of experimental images produced and selected for final pieces.
4.1 Present own experimental images to audience and obtain feedback |
4.2 Review strengths and weaknesses of own experimental photographic outcomes |
3.3 3.3 Experiment with different techniques for post-camera image manipulation
Photoshop manipulation to make photomontage digitally. Intricate cutting out of shapes in the image to create the final piece.
3.2 Produce experimental photographic outcomes Slow shutter movement photography,
in addition to this - some 3.3 evidence with filters and backgrounds3.2 and 3.3 evidence
3.2 Projector photography
3.3 Hand made photomontage Final pieces
1 Photomontage - colour and shape
2. Projector photography colour and shape
3. Digital photomontage - colour, shapes
Photos 4,5,6 Movement - shutter speed and digital effects
3.2 Movement in photogram
|
4.1 Present own experimental images to audience and
obtain feedback
|
|
4.2 Review
strengths and weaknesses of own experimental photographic outcomes
|
Evaluation addresses feedback received and reviews strengths and AFIs in own work. Focus is on photomontages but also addresses feedback for other images used to present in final display of work to make up to minimum of 6 images
Overall comments: Tutor R Horner
PASS
- Gurpreet has thoroughly enjoyed this unit as it has allowed him to use his creative talents to experiment fully.
- The darkroom work was imaginative and highly creative - trying out the technique of moving items under the light.
- Movement images have worked very effectively - as intended for the digital shoot
- Photoshop skills have been applied to the work to manipulate and process work in alternative ways and show precision and creativity once again.
- Final work was extended to showcase a range of experiments to meet minimum of 6 images and show off many of Gurpreet's experiments with photography and editing.
- All assessment objectives have been evidenced through the work produced.


Comments
Post a Comment